What we’ll cover…
• If you should you replace your radiator
• Signs that it’s time to replace a radiator
• Required materials and tools
• Step-by-step radiator replacement guide
• Post-installation maintenance tips
• Safety considerations for radiator replacements
The ultimate step-by-step guide to changing a radiator
In this guide, we’ll give you all the knowledge you’ll need to successfully remove and replace a radiator and protect your central heating against damage.
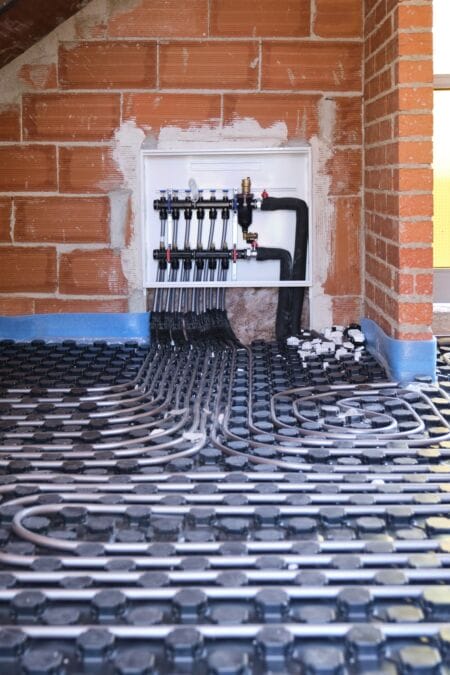
Removing and replacing radiators that are no longer working will save you money on your energy bills and ensure that your home is heated effectively and efficiently.
Please note – Replacing a radiator is a job for a pretty competent DIYer, so only continue reading if you’re confident in your plumbing skills. If you’re not, it may be best to call a qualified plumber.

Why replace a radiator?
Replacing a radiator may not be high on your list of priorities, but there are many reasons to consider replacing your radiators and improving your heating system.
- Energy efficiency
- Safety
- Improved heating performance
- A chance to update and improve the style of your home
When should you replace your radiator?
You should seriously consider replacing your radiator(s) if –
- It no longer gets hot and you can’t fix it
- It makes a lot unusual noises
- It clearly has rust and corrosion that is visible
- It no longer operates efficiently

Replacing your radiators for energy efficiency
Just like anything else, radiators have become batter and more efficient over time.
There are new designs and styles that make much better use of space and manufacturing techniques that help to improve performance.
Like buying a new car because your old one has gotten a bit dated and doesn’t perform as well, the same can be said for older radiators.
They can become much less effective due to –
- Rust and corrosion
- Leaks and cracks
- Blockages and sludge
An old and ineffective radiator doesn’t just offer poor heating capabilities, but it can also do damage to your bank balance (poor radiator efficiency = higher heating bills).

TOP TIP – Radiators are heavy items, and at some point you’re going to have to take it off your wall. having a friend to help you will make this much easier – you could even make it a radiator replacement party!
What tools and materials will I need to replace my radiator?
- Your new radiator (goes without saying really)
- New radiator brackets
- 2 adjustable spanners
- A washing up bowl
- A radiator bleed key
- Pipe/Cable/Stud detector
- A drill – Hammer drill for masonry walls, or a drill driver for internal walls
- A masonry drill bit
- Some steel wool
- Cloths or a rag for spillages
- PTFE tape (also called thread seal tape)
- Somebody to give you a hand
Before you begin with your radiator replacement
It’s important to check the wall you intend to install your radiator on before beginning the process – as they say, “fail to prepare, prepare to fail”.
If you come across any cracks or crumbling bits of plaster or masonry, it’s probably worth your time to make some repairs before you fit your shiny new radiator.
So, it’s important that you know what type of walls you have and the differing properties of installing a new radiator on them.

What kind of walls do you have?
Studwork (plasterboard) walls
If the wall you are affixing your radiator to is made from plasterboard, with a hollow space behind it – a studwork wall – you’ll need to determine exactly where the studs and noggins run.
The studs and noggins are the horizontal or vertical lengths of timber that your plasterboard has been attached to.
This is where your digital detector comes in handy – they even have one that works with your phone, but it is pretty expensive – though you can pick a good quality one up for around £30-40.
The studs in a plasterboard wall form the strongest part, so your replacement radiator will have to be attached to these in order for it to remain stable and safe.
Depending on the location of these studs, you could be limited on the size, shape and material of the radiator you can safely use in the space.
Top Tip – If you do have a stud wall and require a larger radiator, take a look at the radiator feet that are available, as they will help to bear some of the weight of your new radiator and reduce the risk of damaging the stud wall
Masonry & brickwork walls
If you are attaching your radiator to a wall constructed from solid masonry (bricks and blocks held together with cement), you’ll have a wide variety of radiators to choose from to get the job done.
As this type of wall is far stronger than any studwork walls – with the correct fixings and brackets – larger radiators can be placed on almost any part of the wall; even up high if you really want to…

I want to replace my radiator right away!
Right, so you don’t want to read through this entire guide to replacing a radiator?
No worries!
Follow these 10 simple steps to replacing your radiator and you’re away!
- Turn off your heating and isolate the radiator.
- Put your washing up bowl under the radiator valve.
- Open the radiator bleed nipple and loosen the connection between the radiator and the valve allowing water to feed into the bowl.
- Lift your radiator and remove any remaining water from the radiator.
- Remove the valve connectors and clean them.
- Wrap the valve connectors with PTFE tape around 10-15 times.
- Screw in the valve connectors and re-connect your radiator to the system.
- Check that all connections are secure and there are no leaks or drips.
- Turn your heating back on.
- Get warm and toasty with your newly installed radiator.
How to remove and replace a radiator
The best way to make replacing a radiator a whole lot easier is to choose a replacement that has identical pipe centres – the distance between the two water pipes – that your old model had.
(Check out our guide on how to measure a radiator to help you determine the correct size!)
If you pick one that is a different size and shape – say you’re replacing a panel convector with a vertical designer radiator – you’ll need to drain down the system and make alterations to your pipework.
This is a relatively simple job to do and modern plumbing fittings are very easy to work with, so you’ll give yourself a wider range of radiators to choose from if you do it.
Just be sure to drain the system properly before you begin and remove the flooring and any skirting boards that are in your way to get proper access to the pipework.
Remember – Plumbing that involves pipework is covered by a variety of safety regulations, so if you are unsure of what the best practices are talk to a qualified plumber.
An expert how to guide to radiator replacement
Total Time: 1 hour and 30 minutes
Step one
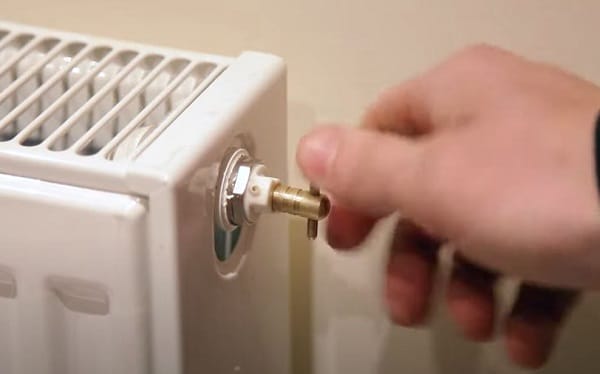
Turn off the central heating and isolate the radiator you want to remove by shutting off the radiator valves at either end.
If you have a manual valve, turn it clockwise until you can’t turn it anymore.
If you have a TRV (thermostatic radiator valve) turn it all the way past zero or to the ‘off’ position.

If you have a lockshield valve at the other end then simply pull off the plastic cover and – with an adjustable spanner – turn the shaft clockwise, being sure to count the number of turns so you can set your new radiator to the same flow rate.
Top tip – If you are replacing a few different radiators have a notebook with you. That way you can keep a note of all of the valve turns you make and any other adjustments.
Step two
Place a washing up bowl under the radiator valve of the radiator you are replacing.
This will help to catch the water that escapes from your radiator and protect your flooring.
Step three
Open the radiator bleed nipple.
Open the bleed valve at the top of your old radiator with your radiator bleed key.
Turn the bleed valve anti-clockwise to fully open the valve.
Doing this will help the water to escape the radiator.
Step four.
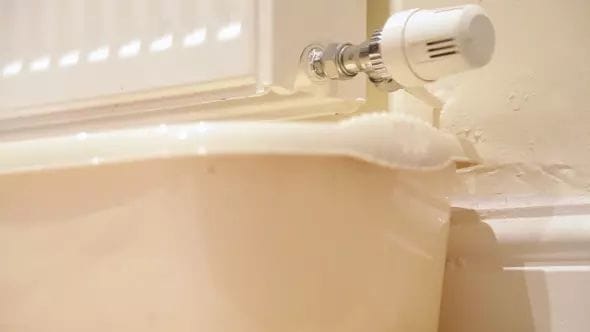
Loosen the connection between the radiator and the radiator valve.
Loosen the connecting cap nut between the valve and the rad to drain the water away and into the bowl.
If you have an old central heating system with some ageing radiators the water inside may be filthy, so be ready to wipe up any spillages with your cloths.
If your washing up bowl isn’t deep enough to catch all of the water, just re-tighten the connecting cap nut and pour the water away.
Step five.
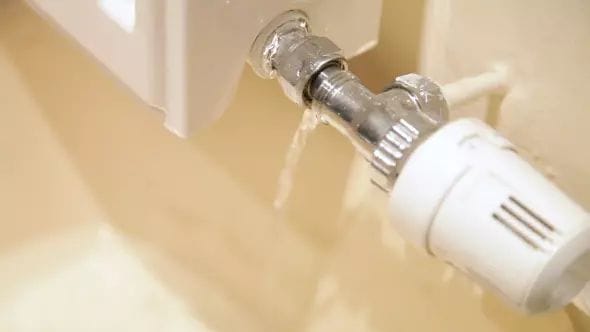
Loosen the connection between the radiator and the valve at the opposite end of the radiator.
Once most of the water has come out of one end of the radiator, move to the other end and repeat the process by disconnecting the other valve.
You may have to hold the body of the valve with another spanner or wrench to stop it from turning and damaging your pipework.
Step six.
Lift the radiator from the wall and remove any remaining water.
Lift your radiator from its mounting brackets and tilt it to drain any remaining water – you may need a hand doing this if you have a larger radiator.
When emptied, stuff an old rag or some tissue into the outlets at either end of the radiator to stop it from leaking.
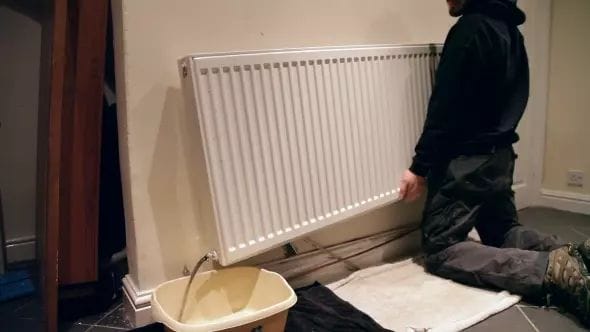
Take your nasty old radiator away and maybe turn it into a coffee table or sell it for scrap!
Step seven
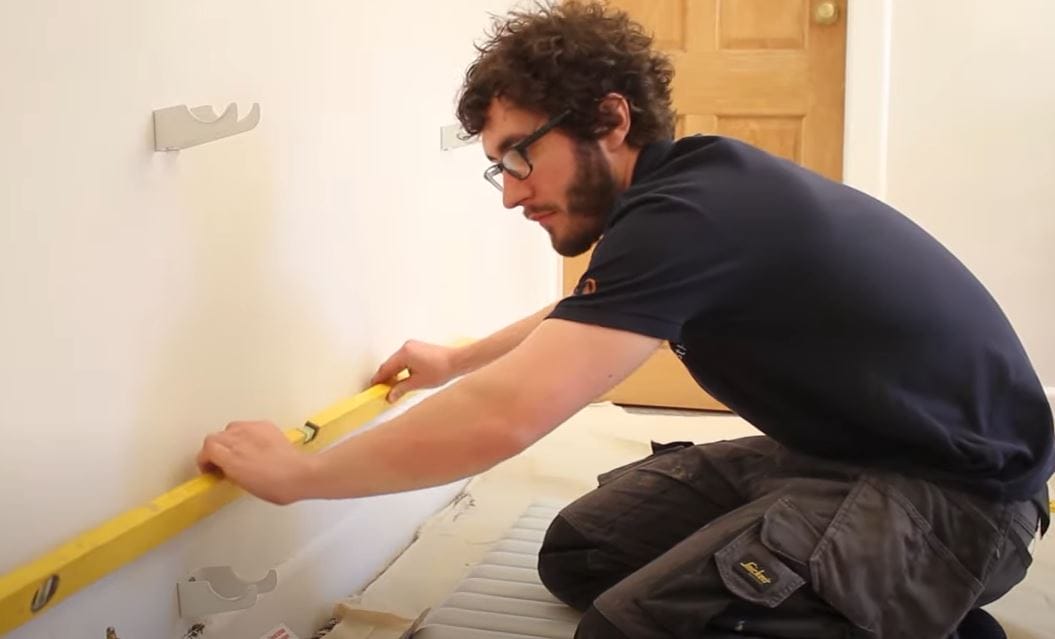
Remove the old radiator brackets from the wall
If the old brackets in place don’t suit your new style radiator take them off the wall and replace them with some new, more suitable ones (these should be supplied with your new radiator).
If you need to drill into the wall to do this, make sure you check what’s behind where you intend to drill with a digital detector before you take the plunge.
They’re really easy to use and will tell you right away if there are any unforeseen obstacles to you completing the work.
Just run it over the surface of the wall and it will tell you instantly if and where any hazards might be lurking.
Top tip – Before installing your new brackets and your replacement radiator, be sure that the wall is clean and the holes created by your old radiator brackets have been filled in.
For additional guidance on this step, check out our guide to installing a radiator.
Step eight
Prepare (dress) your new radiator for installation
Wrap PTFE tape around your new radiator tails between 10 to 15 times.
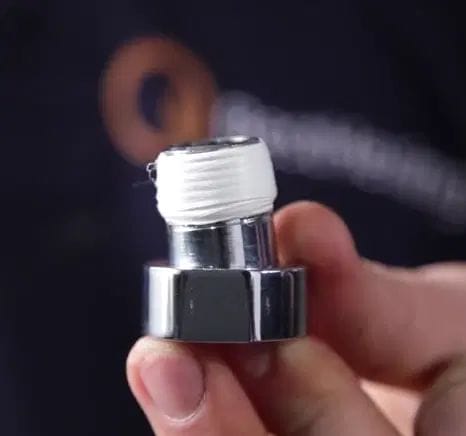
Connect these tails to your new radiator – there should be one at the bottom and on each side.
Step nine
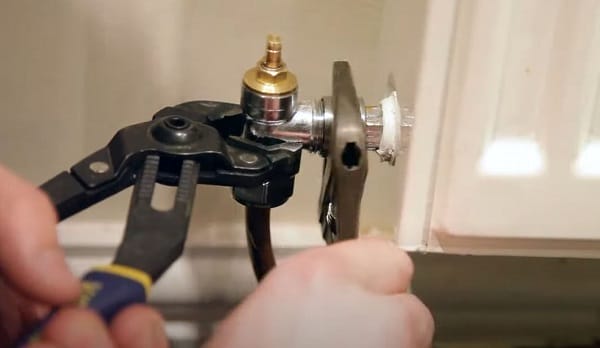
Screw in the bleed valve.

Place the radiator bleed valve at the top of the new radiator, by hand, and nip it up with an adjustable spanner.
Be careful not to overtighten, as this may cause damage to the O-ring and prevent your new radiator from working properly.
Step ten
Check your brackets are level and place your new radiator onto the brackets on the wall.
Step 11
Reconnect the radiator valves

Connect the valves and reset them – using the number of turn measurements that you took earlier – and allow the water to enter the radiator.
At this point, you will need to slightly open the radiator bleed valve to allow the air to escape and help fill the radiator.
Just close it again when water begins to spurt or bubble out of the bleed nipple.
Check all of the valves and joints for any leaks – dry and tighten them if necessary – before turning your central heating back on and re-checking again for any drips.
Step 12
Enjoy your new radiator
And there you have it, you should have a nice shiny new radiator taking pride of place on your wall.
Top tip – After removing your radiator and replacing it for a new one, it’s a good idea to go around and bleed all the other radiators in the system as air can move through pipework and cause your central heating system to make annoying banging sounds.
Adding corrosion inhibitor
Even if you’ve only gone to the trouble of replacing one radiator it’s probably a good idea to flush your entire heating system and add some central heating protector liquid – otherwise known as a corrosion inhibitor.
Corrosion inhibitor will help to prevent damage to the internal workings of your heating system. Having water flowing against metal in a constant motion will cause that metal to rust; inevitably creating sludge in the system and sometimes stopping it working altogether.
It’s normal to add inhibitor when the system is first installed, but it can be added later too. It’s very important that you use a product that is compatible with the materials in your boiler, pipes and radiators – if you are unsure of this, be sure to consult a qualified plumber.
Whenever a radiator is replaced corrosion inhibitor will be lost from the system, meaning that it will not be fully protected against the effects of sludge and corrosion. It’s very important therefore to ensure that the system is properly topped up after you change the radiator.
How much corrosion inhibitor you use is dependent upon the size of your house and the number of radiators you have – in some cases more than one bottle of inhibitor may be required, so as always, refer to the manufacturer’s guidelines.

If you have an older central heating system it may be a good idea to completely flush the system before adding any corrosion inhibitor, as this will help to remove any sludge that has already built up over time.
Turn your heating off and allow the water to cool down then drain the system completely. Refill and then drain again and repeat the process until the water begins to run clear.
Check the manufacturer’s instructions before adding the inhibitor and pour the correct quantity into the feed-and-expansion cistern before filling the system completely. Once poured, turning the boiler and pump back on will mix the corrosion inhibitor thoroughly with the water.
Just in case you are struggling with draining down and filling up your system, here’s a couple of handy videos on how to do both.
And if you get really stuck trying to install a new radiator – we’ve got a video guide for that too!
Good luck trying this out for yourself.
Please note: Our ‘How-To’ manuals are intended only as a guide to assist you with common home heating tasks. Please do not attempt to undertake this task if any of the instructions are unclear, or if you are in any doubt about what to do. Instead, seek advice from a professional.
Frequently Asked Questions
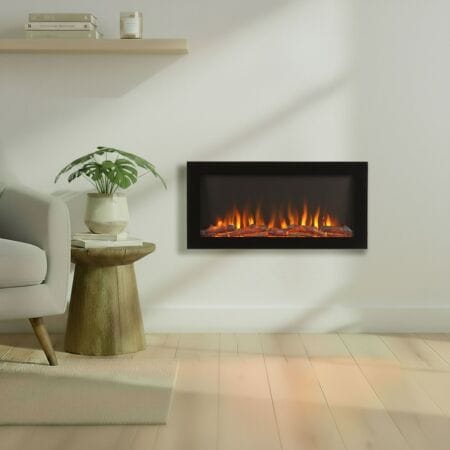
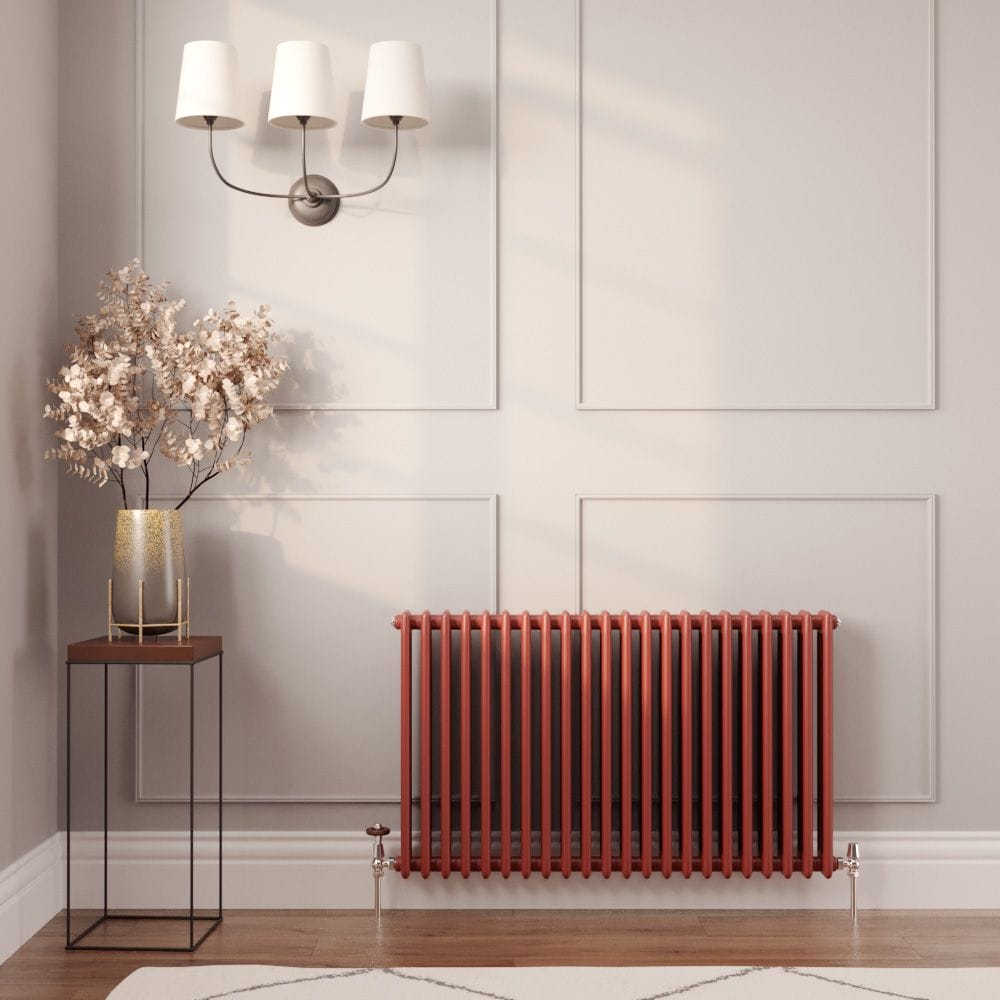
Mirrored radiators are a brilliant modern radiator replacement for anyone looking to add a real sense of designer verve with an unconventional touch to their home heating. They offer supreme functionality and stunning aesthetics, with several space-saving vertical designs available.
For more key help and advice in selecting the perfect modern radiator replacement, take a look at our blog, Obeying the rules of cool: a modern radiator replacement guide.
Modern radiator replacements from BestHeating are defined by their premium performance characteristics in addition to stunning aesthetics. We offer an excellent array of ultra-stylish contemporary designer radiators in all sorts of styles, shapes, orientations and colours.
To discover more, take a look at our dedicated blog, Obeying the rules of cool: a modern radiator replacement guide.
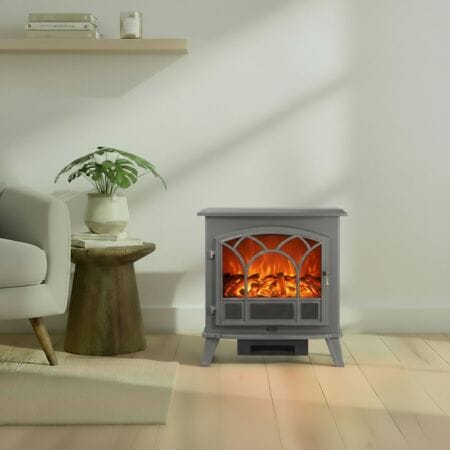
Although they are widely considered to be a traditional heating option overall, some cast iron radiators can be thought of as modern radiator replacements, and will suit contemporary settings equally as well as they will classic or retro spaces.
To find out more about these and any other modern radiator replacement styles, explore our dedicated blog, Obeying the rules of cool: a modern radiator replacement guide.
Electric radiators can be considered to be the easiest radiator replacement choice to install. They work via a simple ‘plug in and go’ method, negating the need for any invasive plumbing work to occur. And in addition to an easy fitting and operation, electric radiator replacement options bring various other advantages such as remote temperature control and an energy efficient performance that can lead to reduced energy bills.
To find out more about the finest modern radiator replacement options we have to offer, browse our blog, Obeying the rules of cool: a modern radiator replacement guide.
Middle connection radiators can be considered the best style of modern radiator replacement options to save space. These rads incorporate central connection valves, meaning there is no requirement to leave room at either end of the radiators, freeing up significant wall space. They are therefore an ideal selection for compact rooms especially.
A deeper insight into the very best modern radiator replacement styles can be found in our dedicated blog, Obeying the rules of cool: a modern radiator replacement guide.
Generally speaking, plumbers will charge between £100 and £200 to replace radiators in the UK.
Certain circumstances may lead to price discrepancies, such as the layout of the space and potential difficulty of the removal and installation, as well as the size of the replacement radiators. How busy the particular plumber is could also influence the expense.
For a more detailed insight into UK radiator replacement, take a look at our dedicated blog – How To Replace A Radiator: A BestHeating Guide.

John Lawless is SEO Manager at BestHeating and a recognised expert in home heating. With over a decade of experience in the industry, he blends technical insight with practical advice on everything from energy efficiency to radiator design, and more. John’s work has featured in national media and leading home & garden publications, and he leads the editorial strategy for the BestHeating Advice Centre – helping homeowners make smarter heating choices with confidence.