Table of Contents
What we'll cover...
The possible causes of a leaking radiator valve and how to fix a leaky valve, with detailed insights into different types of setups including leaking thermostatic radiator valves.
What is a radiator valve?
A radiator valve might not be much to look at, but it actually plays a prominent role in your heating system overall. It’s the small attachment at the base of your radiator that controls the flow of hot water. There are usually two valves on every radiator:
- One controls how much heat the radiator emits (sometimes a thermostatic radiator valve).
- The other (the lockshield valve) balances water flow across your entire system.
These valves work hard in the background, quietly regulating your room temperature while you ignore them for years. That is, until one starts leaking and turns your cosy living room into an unwanted paddling pool.
Reasons why radiator valves may start leaking
1. Loose or worn gland nut
This is the nut that surrounds the valve spindle (the part you turn). Over time, it can loosen from general use or temperature changes, which allows water to escape.
Top tip: If water leaks from where the valve spindle enters the valve body, chances are the gland nut requires a simple tweak.
2. Perished washers or seals
The inner components of the valve, particularly rubber washers, can degrade over time as they age. Exposure to heat, fluctuating pressure, and oxygen in the system eventually wears them down.
3. Corrosion and limescale buildup
Visible rust, green staining, or white chalky residue are obvious signs of corrosion or limescale buildup. This usually indicates a slow leak has been occurring for a while. This is a quite common issue for older manual radiator valves or systems that don’t use corrosion inhibitor.
4. Damage from over-tightening
If you’ve tried to “fix the drip” by over-tightening everything in sight, it’s possible that you might’ve done more harm than good. Excess pressure can crack joints or strip threads, especially in relation to cheaper fittings.
5. High boiler pressure
Your boiler pressure should sit somewhere between 1.0 and 2.0 bar. If the pressure is too high, it can stress valve seals, forcing water out through weak points such as the gland nut or valve tail.
6. Poor installation
If the valve wasn’t seated properly during installation or if different metals were mixed without protection, leaks could develop over time. Galvanic corrosion loves a mismatched metal combination to make its life easy.
Identifying a radiator valve leak
Think your radiator’s leaking from the valve? Here’s how to check:
- Damp patch or rust at the foot of the radiator
- Water marks or trickles beneath the radiator valve
- A “weeping” valve (slow, occasional drips rather than regular, consistent flow)
- Black or green discolouration on the valve threads or the floor underneath
Be sure to check exactly where the water is coming from:
- Top of the valve = gland nut leak
- Connection to the radiator tail = compression fitting or olive seal issue
- Connection to the pipe = potential PTFE failure or incorrect fitting
Knowing whether to replace or repair your radiator valve
Repair the valve if:
- The valve body is in good condition
- The leak is minor and emerging from a nut or washer
- It’s a relatively new fitting
Replace the valve if:
- Corrosion or cracking is visible
- The valve is stuck or stiff
- It’s leaking from multiple places
- You’ve attempted tightening the valve but a leak persists or returns
Replacing a leaking thermostatic radiator valve is also a clever move if the thermostat dial is cracked, loose or unresponsive. Of course, you could upgrade to a smart thermostat to pair with your TRVs too.
Required tools and equipment for radiator valve repairs
Here’s your essential radiator leak toolkit:
- Adjustable spanner – To grip and tighten or loosen valve nuts as needed
- PTFE tape – Seals threaded connections and prevents leaks
- Radiator bleed key – For bleeding air out after the job. See our guide on how to bleed a radiator for detailed instructions
- Basin and old towels – To catch spills and protect your flooring
- Replacement valve – An optional but obvious necessity if you are deciding on a full replacement
- Olives and compression fittings – To reconnect pipework if needed
Step-by-step guide to fixing a leaking radiator valve
This fix assumes you’re dealing with a compression fitting leak or a gland nut issue, as opposed to a burst pipe or full valve failure.
Step 1: Switch off the heating and let it cool down

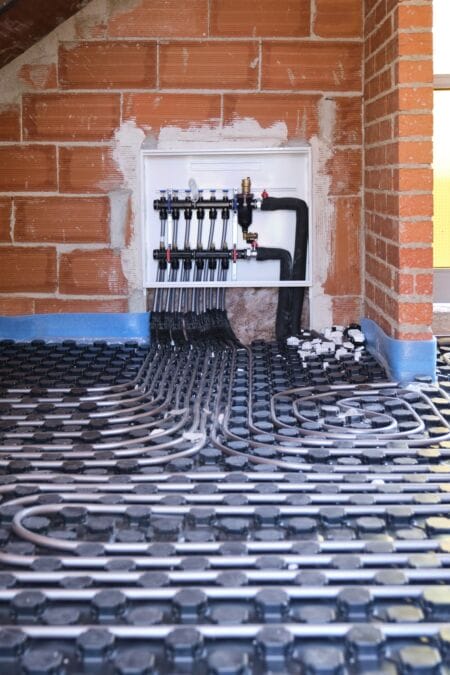
Safety first. Switch off the heating and make sure you’re working on a cool radiator to avoid scalding water or accidental boiler cycles.
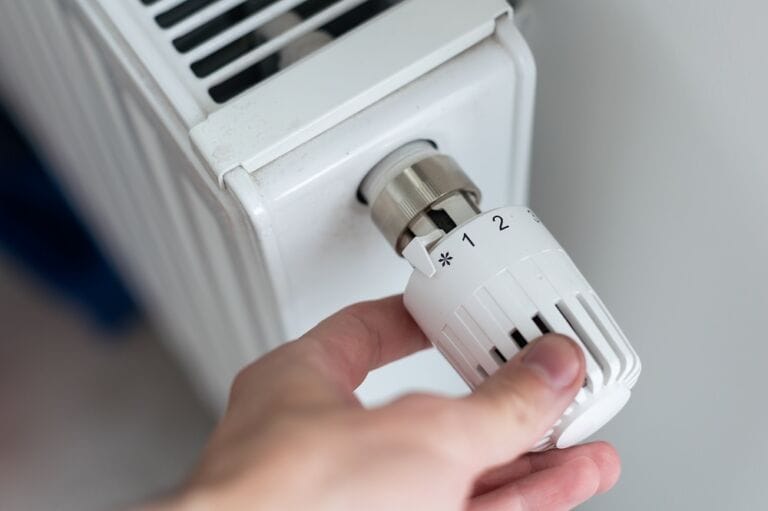
Step 2: Isolate the radiator
Step 3: Place a bowl and towels beneath

Leaks are messy. Place a bowl or bucket underneath your designer radiator to catch any water around the valve, and surround it with towels to soak up any excess.
Step 4: Tighten the gland nut

Use a spanner to gently tighten the gland nut. This will often stop leaks from the spindle area.
Step 5: Reseal with PTFE (if necessary)

Still leaking? Undo the gland nut, wrap PTFE tape around the valve spindle or thread, and re-tighten. This can reseal micro-gaps to prevent pinhole leaks.
Step 6: Reopen the valves

Slowly reopen both valves and listen out for the flow of water. Bleed any trapped air from the radiator with your bleed key.
Step 7: Test and monitor

Fire up the heating and inspect the valve area after 15-30 minutes. Dry the valve first so you can spot any fresh leaks.
Common issues when repairing radiator valves
Stripped or crossed threads
Can occur if you over-tighten or misalign the compression fitting. You’ll need new fittings and olives in this scenario.
Water leaks after PFTE tape
This typically means not enough PTFE was used, or it wasn’t wrapped in the correct direction (always go clockwise when looking at the threaded end).
Seized valve
If your valve handle struggles to turn or feels gritty, internal rust has probably seized it up. You’ll require a full replacement in this case.
When you should call a professional for a leaky radiator valve
Some jobs are best left to the professionals. Call a plumber or heating engineer if:
- Radiator leaks continue after basic valve tightening and taping
- You feel uncomfortable working with water or heating systems
- The leak is affecting boiler pressure
- Pipework or multiple valves require replacement
Most professional repairs or replacements will only take an hour or two, especially if no draining is required.
BestHeating: Radiator and heating specialists
A leaking radiator valve might seem a minor concern – until it ruins your floor, causes pressure issues, and drives your boiler into a sulk.
BestHeating are on hand to help you prevent all that drama. Whether you’re tackling a minor drip or planning a full radiator upgrade, we’ve got you covered with expert guidance, quality valve essentials, and stylish new radiators to make the whole thing worthwhile.
Let us know about your leaky valve repair hacks and radiator refreshments in the comments, or through Instagram, Facebook or X.
John is a Research Specialist for the Best Heating Advice Centre, where for over nine years he has dedicated himself to demystifying home heating for our customers. He specialises in creating clear, data-driven guides and how-to articles by collaborating directly with our team of certified heating experts and product engineers.
His work, built on a foundation of journalistic research, has helped millions of readers make confident and informed decisions about their home heating. When he’s not breaking down the heat output differentials from radiators to heated towel rails, John fancies himself as a fine football and music connoisseur.


