Removing radiators to decorate, made simple
If you are planning on doing some decorating, chances are that you’ll need to remove and refit a radiator.
Many radiators can be quite heavy, so even if you think you’ll be able to lift the radiator by yourself we recommend getting someone to help you.
Watch the video guide or follow the simple step-by-step process for full instructions on removing a radiator for decorating.
What tools do I need to use?
To safely remove your radiator from the wall, you will need the following tools:
- An adjustable spanner
- A pair of grips
- 2 towels
- A washing up bowl
- A radiator bleed key
How to remove a radiator for decorating
This simple task should take around 30 minutes
Just follow these step-by-step instructions to remove your radiator for decorating.
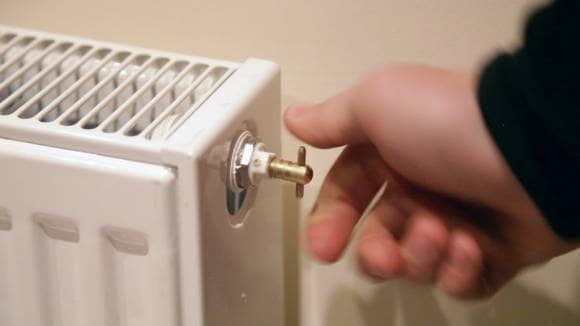
- Turn off the radiator
Close your radiator valves by turning them clockwise until they are tightly shut.
This will isolate the radiator from the rest of your central heating system.
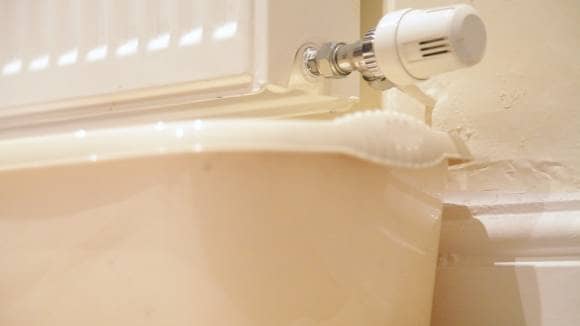
- Place towels & bowl beneath the radiator
Place a couple of towels & the washing up bowl underneath the radiator valve.
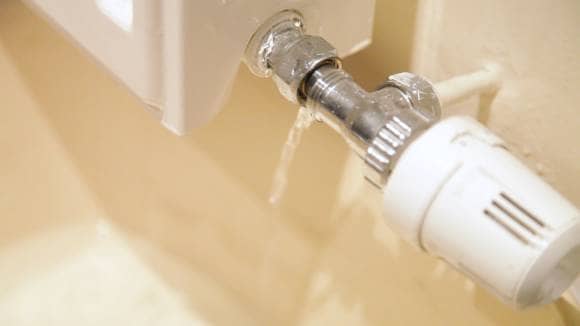
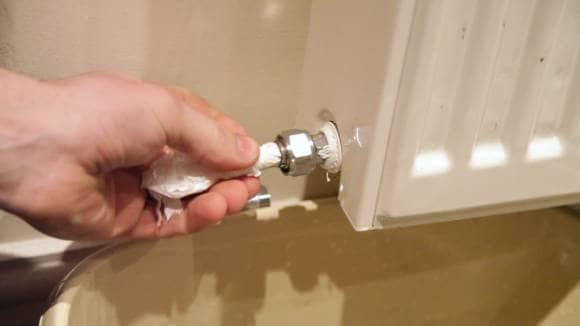
This will catch water from your radiator as you begin to remove it, helping to avoid any nasty stains on the floor. - Undo the radiator valve nut
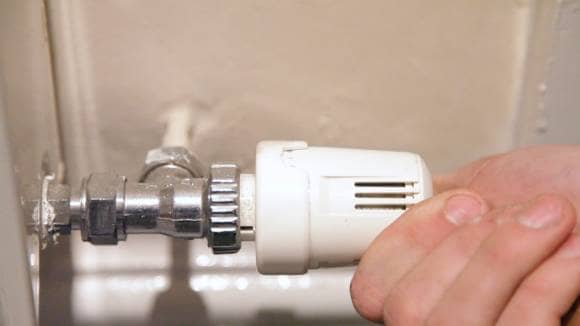
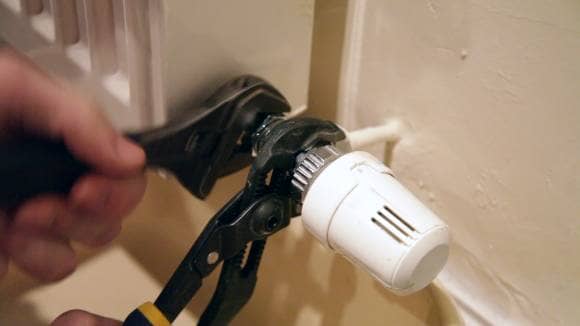
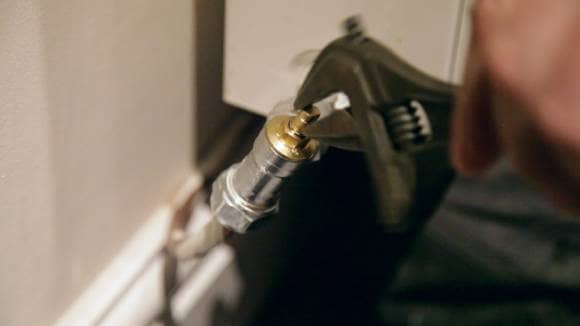
Once the bowl is in place, take your grips and adjustable spanner and gently undo the radiator valve nut.
- Drain water from the radiator
Drain the water from the radiator and into the washing up bowl.
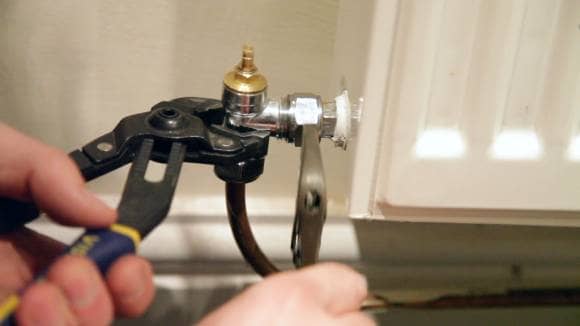
- Get the last few drops out of the radiator
Using a bleed key, open the bleed valve, by turning your radiator key anti-clockwise – this will help to drain the water into the bowl.
- Move to the other valve
When the radiator is drained close the bleed valve back up (clockwise), move to the other side of the radiator and then undo the valve nut on that side.
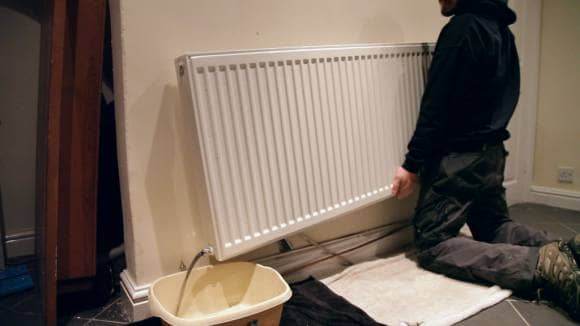
- Remove any remaining water
Gently lift the radiator from the brackets and tip out any remaining fluid into the washing bowl.
Keep in mind that some radiators are heavier than others, so you may need help when lifting. - Bung up the valve inlets
When you are happy that all of the excess water has been removed, bung up the radiator valve inlets with tissue paper.
You can then remove the radiator from the wall. - Lift the radiator off the wall
Gently lift the radiator off its brackets and move aside.
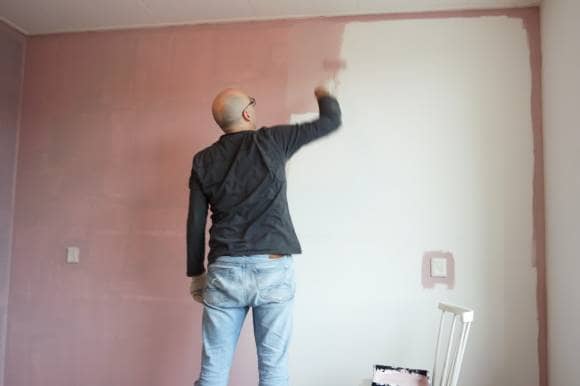
- Paint your wall
Give your wall a fresh lick of paint and leave to dry.
- Reconnect your radiator
Once the paint has dried, put your radiator back on the brackets and reconnect it to the valves & pipework – opening the valves fully by turning them clockwise.
Once you have reconnected your radiator to the flow and return pipes, it is time to refill the radiator – you can learn how to do that below.
But, for now, you have successfully removed a radiator for decorating.
Well done!

How do I refill my radiator?
When you remove a radiator, the pressure in your boiler can drop – similar to what happens if you have a leak – so you will have to top up your heating system to get it back up and running properly.
If you have an open-vented heating system, water will automatically come back into your radiator when you open the radiator valves.
However, with a pressurised heating system you will have to open the filling loop to top up the system pressure.
And that is it – you have successfully removed and replaced a radiator for decorating – I hope you didn’t forget to paint the wall!
Please note: Our ‘How-To’ manuals are intended only as a guide to assist you with common home heating tasks. Please do not attempt to undertake this task if any of the instructions are unclear, or if you are in any doubt about what to do. Instead, seek advice from a professional.
Frequently Asked Questions
The most effective means to renovate radiators is typically to upgrade to a newer version, especially if you are swapping an outdated model for a brand new designer radiator, for example.
There’s an extensive selection of ultra-stylish modern radiators on the market nowadays that enable you to turn your home heating into home décor.
Alternatively, if you don’t want to commit to the purchase of a new component, you can renovate your radiators by painting them. Read our full Advice Centre guide, How to Paint a Radiator, to learn how.
Yes, you can swap radiators without professional assistance, especially if you have any sort of DIY experience.
Take a look at our Advice Centre blog, How to Replace a Radiator, for key tips on swapping your radiators quickly and easily.
It will typically take in the region of 20 minutes to swap radiators, replacing your existing component with a brand new designer radiator, for example.
Our Advice Centre blog, How to Replace a Radiator, includes information about all the equipment you need and how you can swap your radiators quickly and easily.
Yes. You can follow a few simple steps to complete the successful removal of your radiators for decoration or refurbishment work.
Firstly, you should switch off the radiator and drain the water within it. Once all the water is gone, you can temporarily clog the valve inlets using tissue paper or something similar.
Your radiator will then be ready for removal from the wall. Just lift it from the wall brackets gently and commence with your painting or renovation tasks.
When the refurb work is done, you can re-attach your radiator to the wall and refill it to get back up to speed.
More detailed instructions can be found in our Advice Centre blog, How to Remove a Radiator for Decorating.

John trained in journalism before finding his way to the BestHeating Advice Centre team. He uses his journalism skills to meticulously research heating topics and bring you the latest news and views on all things home heating related. He’ll also beat you at any sport that involves a cue!